Tutorial - Beginners: Resizing & Cropping Images
Recommended Program: Photoshop
I've been thinking of starting a couple of tutorials here, and since resizing has been requested by a few people, here it is! What better place to start than the basics, right?
Resizing image is one of the most basic things you need to learn from graphic making. The most important thing to remember is to
never mess with the image's proportions. Doing so will result in skewed or stretched images which would not be attractive.
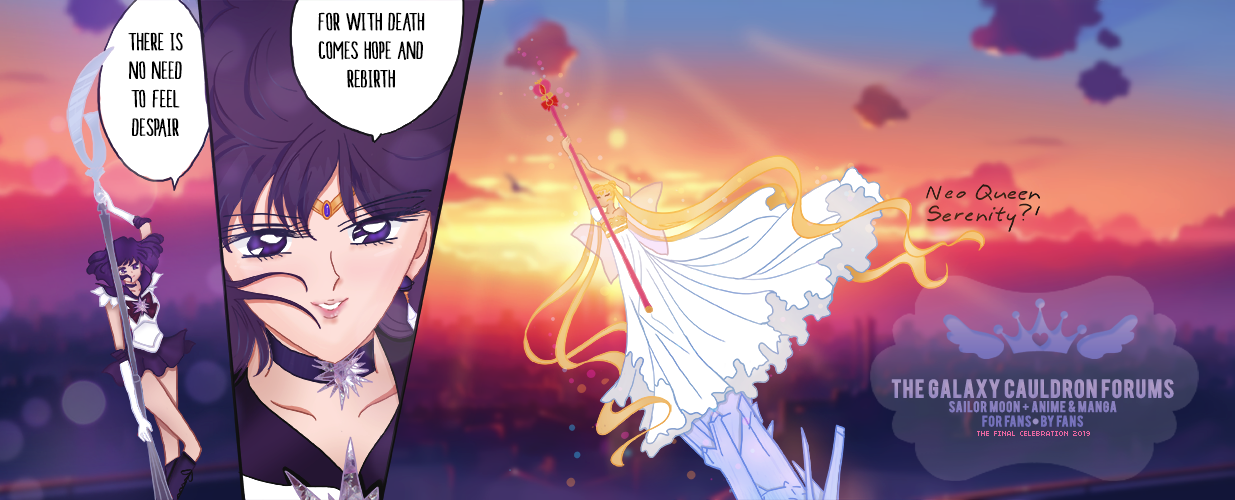
1. To start, of course we have to open the image you want to resize (File > Open). For this example I'm going to use the following image: Sailor Moon Crystal.
2. Make sure you click on View > Actual Pixels in order to be able to see exactly how big it is (Zoom 100%).
3. To see the image's original size, go to Image > Image Size. You will be able to see the following:
Which informs us that the image is 731 pixels (width) x 1037 pixels (height). If your default measuring option is in cm or something else, make sure you change it to pixels by clicking on the downward arrow beside it.
Important: Make sure Constrain Proportions is checked in the window above. This will keep your image's proportions intact.
4. Now, say we're making an avatar. In GC the size would be 110 x 170 pixels. Where you go from here depends on what you want the avatar to show. Just a close up of Sailor Moon's face or keep everything?
Let's pick the latter option first because it's simpler. All you need to do then is to edit the image size. Specifically the height. (To know which one you need to edit - the width or the height, look at the bigger number. You will notice that if you try to edit one, the other will be automatically changed. This is part of maintaining the image's proportions.)
5. Open Image > Image Size again. Enter the height of the avatar you want which is 170 pixels. Note that the width now automatically changes to 120, which is bigger than the width we need for the avatar. That is good. If you'd tried to change the width to 110 instead, you would get 156 pixels for the height, which is not tall enough to fit the avatar canvas - bad. If you're unsure which to change, just try both and figure out which would allow the image to completely fill the canvas. (This is a bit difficult to explain but I hope you get it by trying.)
6. Now open a new canvas by clicking File > New. Insert the measurements necessary (110x170) as below:
7. Now all you need to do is drag the Sailor Moon image to the blank one using the Move Tool (the top one along the line of icons on the left). The image is still wider than the canvas, but not by much. Adjust it however you like. You'll be losing 10 pixels from the width but it shouldn't matter all that much.
8. Here's the result:
Now, say you don't want that Crystal logo and want a more close-up image of Sailor Moon. Go back to Step 4, before you edit the original image's size. Click the Crop Tool:
And make a rectangle around the part of the image that you want to keep (remember to create a shape that resembles your avatar though, so in this case it would need to be a rectangle with bigger height than width. A square wouldn't work). Do this by clicking on a corner and dragging your mouse over the part you're keeping. Don't let go until you've covered all of it. When you've let go, it should look like this:
By this point you can still edit the crop area by hovering over the many points around the square. Once it turns into an arrow, you can drag it left or right, depending on what you need. If you click on the corner point, you can enlarge or shrink it diagonally as well, like so:
Once you're satisfied, click the Move Tool again, and an option should pop up:
Click "Crop". You should only have the selected part of your image now.
From here, go to Step 5 and follow through to the end. This is the new result:
Feel free to crop according to your needs! You can make an even more close-up image by cropping *just* around Sailor Moon's face. Experiment until you get the hang of it ^^
Note: Images that are like the one above (tall, not wide) generally don't work well for signatures (which are wide, not tall), however, it's still possible to create a signature out of it if the original image is big enough. You'd just have to resize the image by changing the width to 450 pixels. When you drag it to your canvas, you will likely only be able to display a small part of it, though, so you'll have to be selective (example: Signature)
When I'm lazy or want to experiment, sometimes I don't bother cropping, but instead experimentally resize the image to another size (like from 1500 to 1000 or 500), then drag it to my canvas and see if it's too big or small, which part of it I would like as the focus, etc (because when you don't crop, you can drag it around as much as you like, keeping all parts of the image intact. But only the parts visible on the canvas will show up as the end result of course). If it turns out too big or too small I just resize it again until I get the size I like.
If there's any part that isn't clear at all, please feel free to ask! I don't know how well I'm explaining this and for all I know it might not make any sense at all. Let me know whether this helped or not ^^
#agtutorial #ag


![[Tutorial] Beginners Resizing & Cropping Images I1pAEvz](https://i.imgur.com/i1pAEvz.png)
![[Tutorial] Beginners Resizing & Cropping Images QZqh4JG](https://i.imgur.com/qZqh4JG.png)
![[Tutorial] Beginners Resizing & Cropping Images MH7i8KO](https://i.imgur.com/mH7i8KO.png)
![[Tutorial] Beginners Resizing & Cropping Images UuMQTQy](https://i.imgur.com/UuMQTQy.png)
![[Tutorial] Beginners Resizing & Cropping Images D065hdN](https://i.imgur.com/d065hdN.png)
![[Tutorial] Beginners Resizing & Cropping Images VRbJSxZ](https://i.imgur.com/VRbJSxZ.jpg)
![[Tutorial] Beginners Resizing & Cropping Images F8txj2I](https://i.imgur.com/F8txj2I.jpg)
![[Tutorial] Beginners Resizing & Cropping Images XVrNpNj](https://i.imgur.com/XVrNpNj.jpg)
![[Tutorial] Beginners Resizing & Cropping Images YMLKulb](https://i.imgur.com/yMLKulb.jpg)


![[Tutorial] Beginners Resizing & Cropping Images Yamisig3copy_zpscf835981](https://2img.net/h/i1310.photobucket.com/albums/s660/Kayariah/yamisig3copy_zpscf835981.png)
![[Tutorial] Beginners Resizing & Cropping Images Yay2_zpsd5d5cf49](https://2img.net/h/i1310.photobucket.com/albums/s660/Kayariah/yay2_zpsd5d5cf49.png)
![[Tutorial] Beginners Resizing & Cropping Images YAY_zps851a60f4](https://2img.net/h/i1310.photobucket.com/albums/s660/Kayariah/YAY_zps851a60f4.png)
![[Tutorial] Beginners Resizing & Cropping Images 1637911638](/users/2914/10/33/88/smiles/1637911638.gif) I never knew you could do this in Photoshop =o which seems silly to not know, but I always just cropped it and resized it myself! Never thought of changing the size of the image before cropping it and just... I <3 it!! Thank you Mercury!!
I never knew you could do this in Photoshop =o which seems silly to not know, but I always just cropped it and resized it myself! Never thought of changing the size of the image before cropping it and just... I <3 it!! Thank you Mercury!!


![[Tutorial] Beginners Resizing & Cropping Images Sailor11](https://i.servimg.com/u/f35/19/51/87/65/sailor11.jpg)
![[Tutorial] Beginners Resizing & Cropping Images Sailor10](https://i.servimg.com/u/f35/19/51/87/65/sailor10.png)

